*Disclaimer*, this powerpoint template is the work of my brilliant MAT. This is a blog about how I use it.
I shared a teaser of what a lesson in my classroom looks like earlier today. I thought it’d be a good chance to share one example lesson & talk through how I structure it. This example lesson is downloadable below:
Now, the first slide on this powerpoint (shown below) is for staff. It shows the spec, rough sequence of lessons as well as any prior knowledge that we should be expecting & what comes next.

The next slide is the “do now” for the students & is built very heavily around retrieval. Students will complete questions on what they covered last lesson, last term & last year (as well as a much more challenging stretch & challenge question). I’ve left this blank in the downloadable version, but populated it below with what I’d add as the questions.

We all know the “forgetting curve” and I’ve found that organising the do now in this way maximises the amount that the students remember. Also note how I’ve managed to directly relate Q5 & 6 in the “last year” section to the lesson. This will help draw out schema connections for students & link topics together.
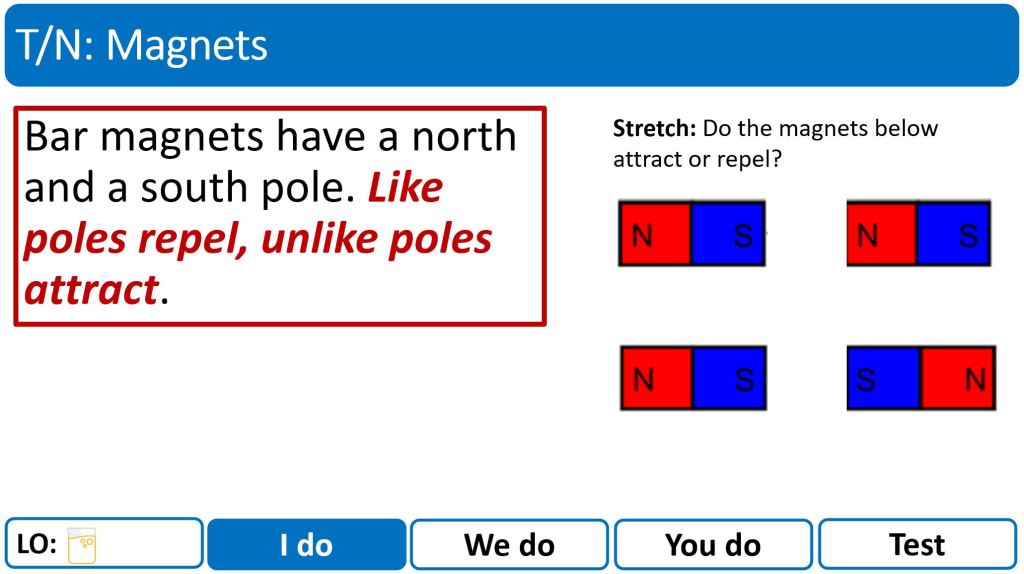
After the “do now” comes the teacher exposition part of my lesson (which is teacher led & called the “I do” section). Here, I like to keep the slide uncluttered & basic. It pretty much only contains the “core” knowledge that I *need* students to learn. I add extra detail & hinterland verbally. Note that my routines are also pretty explicit. Anything that is in a red box, I expect students to write down. I usually let them do this in silence, if any finish then they answer the “stretch” question. I then require the students attention & add detail to these notes verbally (while questioning to check for understanding).
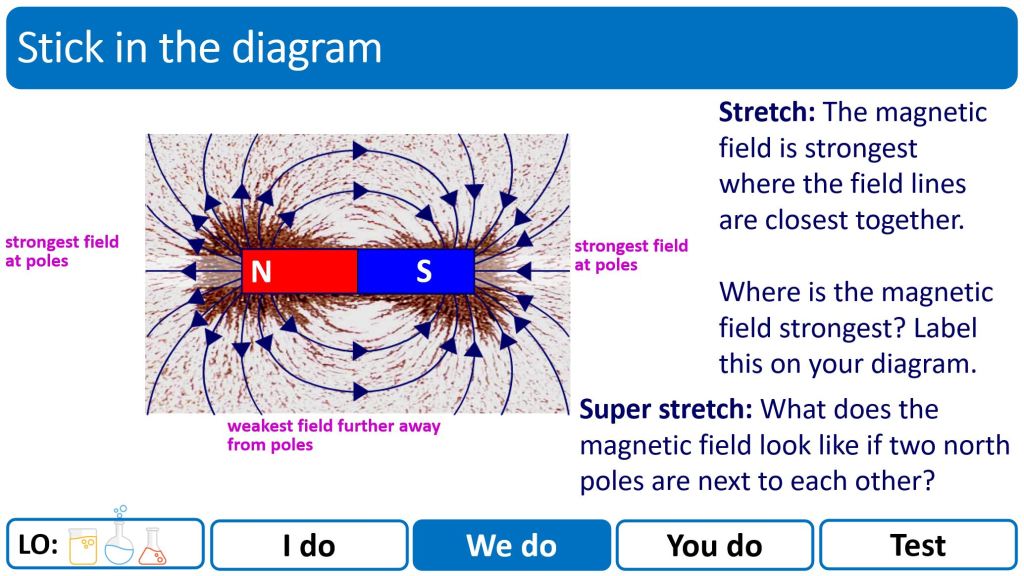
There are then usually about two/three similar slides, then if we do something together as a class then we move to the “we do” section of the lesson. One example is below where I’m getting students to stick in & label the diagram (the labels of strongest/weakest field are on an animation and come up later). Here, I will be modelling where the field lines will be strongest (again, questioning to check for understanding). There are stretch tasks for any students that finish & these are also discussed verbally.
From here, I then move into the “you do” part of the lesson which is usually one of my ramped worksheets.
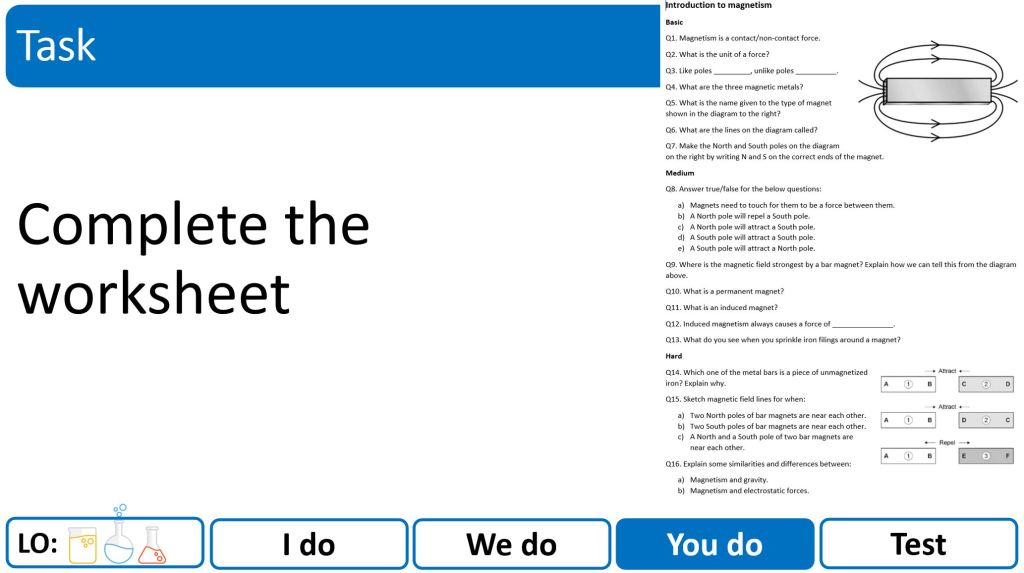
If you follow my work closely then you’ll know that I’m a big believer in deliberate practice & SLOP. My tasks have a *lot* of questions & I wouldn’t have it any other way. To read more about *how* I write a task like this then I wrote about this recently here:
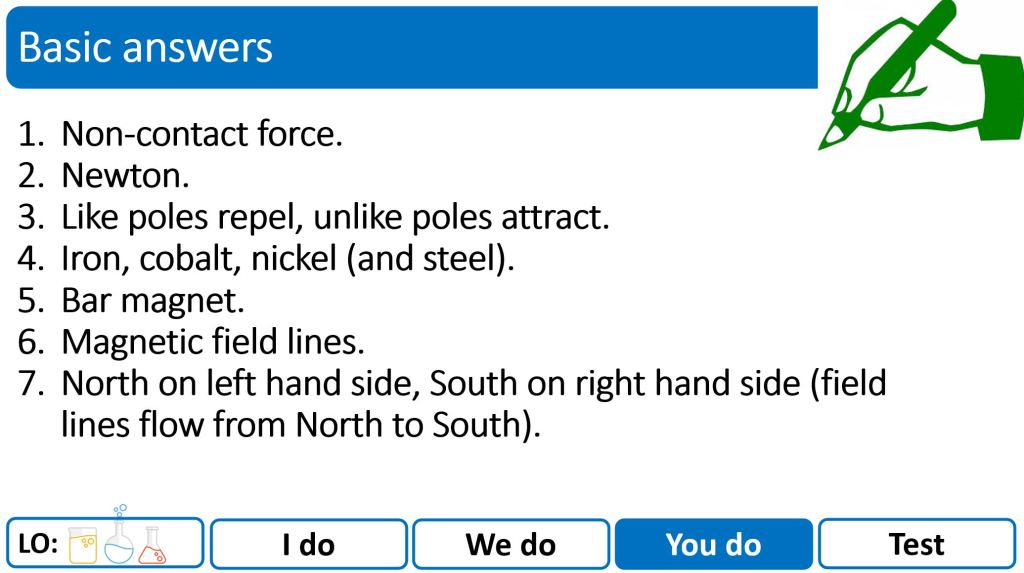
During the task, I will be circulating around the class, live marking & addressing any misconceptions. At the end of the task, I share the answers & students will self assess any questions that I haven’t gotten around to marking.
Following this, I then enter the “test” phase of the lesson which I brand “struggle time”. I emphasise that it’s supposed to be hard & that it’s important to show resilience during this time. This section of the lesson is in complete silence, completely independent & I do not help. How well the students do on the exam question informs me with how successful the lesson has been.

Students self-assess their own answers & I flick through their books at the end of the lesson. If the they have “bombed” struggle time then I will re-teach and review next lesson. If they’ve smashed it, then I move on.
I’m *considering* sharing some more lessons like this, time permitting. Though if it takes a while, then I probably won’t get around to it. In the meantime, I thought it’d be useful to talk about how I construct a lesson. Hopefully you found it useful!

Amazing, thank you so much for taking the time to do this.
LikeLike